Phone Product Photography: How to Take Photos That Sell (No Studio Needed)
Learn product photography with your phone: use window light, a simple backdrop and basic editing to create polished product photos for your online store.
12 min read
On this page
Product photography with phone cameras: a simple guide for online stores
You don't need a fancy camera or a studio for product photography with phone cameras. A recent smartphone, a window with soft daylight, a plain backdrop and a few minutes of basic editing will get you clean, consistent online store images. Shoot a handful of angles per product, keep the look the same across your shop, and upload them to your Shopstar page so buyers can see exactly what they're getting.
That's the whole game, really. In the rest of this guide I'll walk you through it step by step, with South African prices, South African weather (hello, grey Cape winters and load shedding) and no photography jargon. If you can point a phone at a mug, you can do product photography with a phone well enough to build trust and make sales. 📱
Why product photos make or break an online sale
When someone walks into your shop, they pick things up. They smell the candle, feel the fabric, turn the earrings in the light. Online, none of that is possible, so your photos have to do the job of the shop floor.
The research backs this up. In Baymard Institute's product page usability testing, 56% of users' first action on a product page was to explore the product images. Baymard also found that around 42% of users try to gauge a product's size from its pictures. Shoppers study your photos closely, looking for answers to a few basic questions. How big is it? What's the colour really like? What do I actually get?
There's a legal side too. Under South Africa's Consumer Protection Act (CPA), consumers are entitled to goods that match how they were described and presented. Online sales also fall under the Electronic Communications and Transactions Act (ECTA), which expects sellers to give accurate information about what they're selling. A photo that shows deep forest green when the product is really olive means disappointed customers, awkward messages and returns. Salsify's 2024 consumer research found that 77% of surveyed shoppers had returned something because it didn't match its description. That figure covers product content generally, not photos alone, but it shows what's at stake when expectations and reality drift apart.
An illustrative example of product photography with a phone
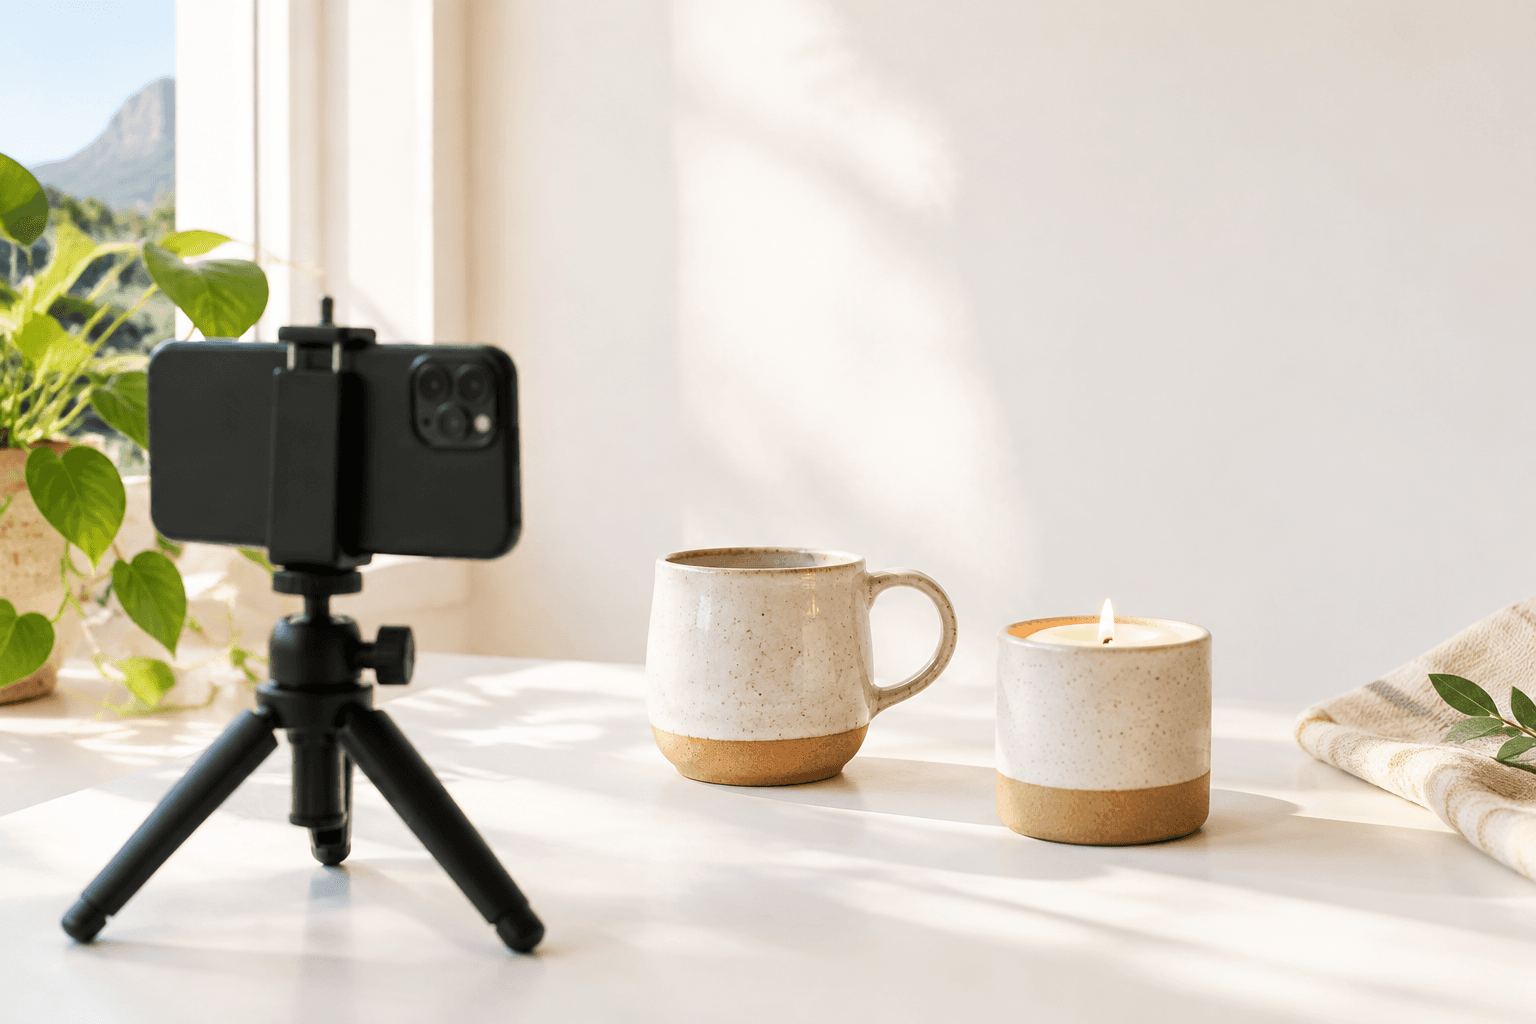
Picture a Cape Town candle maker (an illustrative scenario, not a specific seller). She starts out with dim photos taken on her kitchen counter at night, with a tea towel, a cereal box and a half-folded washing basket in the background. The candles look yellowish and flat, and customers keep asking, 'What colour is it really?' So she moves her setup next to a window, tapes a sheet of white board behind the candles and shoots in the morning. Same candles, same phone. The photos now look clean and trustworthy, and the repeat questions stop.
This matters even more if you use a link in bio to send social media followers to your shop. Those shoppers are on a phone, scrolling fast, and they decide in seconds. Your first image has to earn the click.
The good news is that great product photos come down to light and consistency, not expensive gear.
The simple product photography kit you already own
Let's keep this cheap. Here's what you actually need.
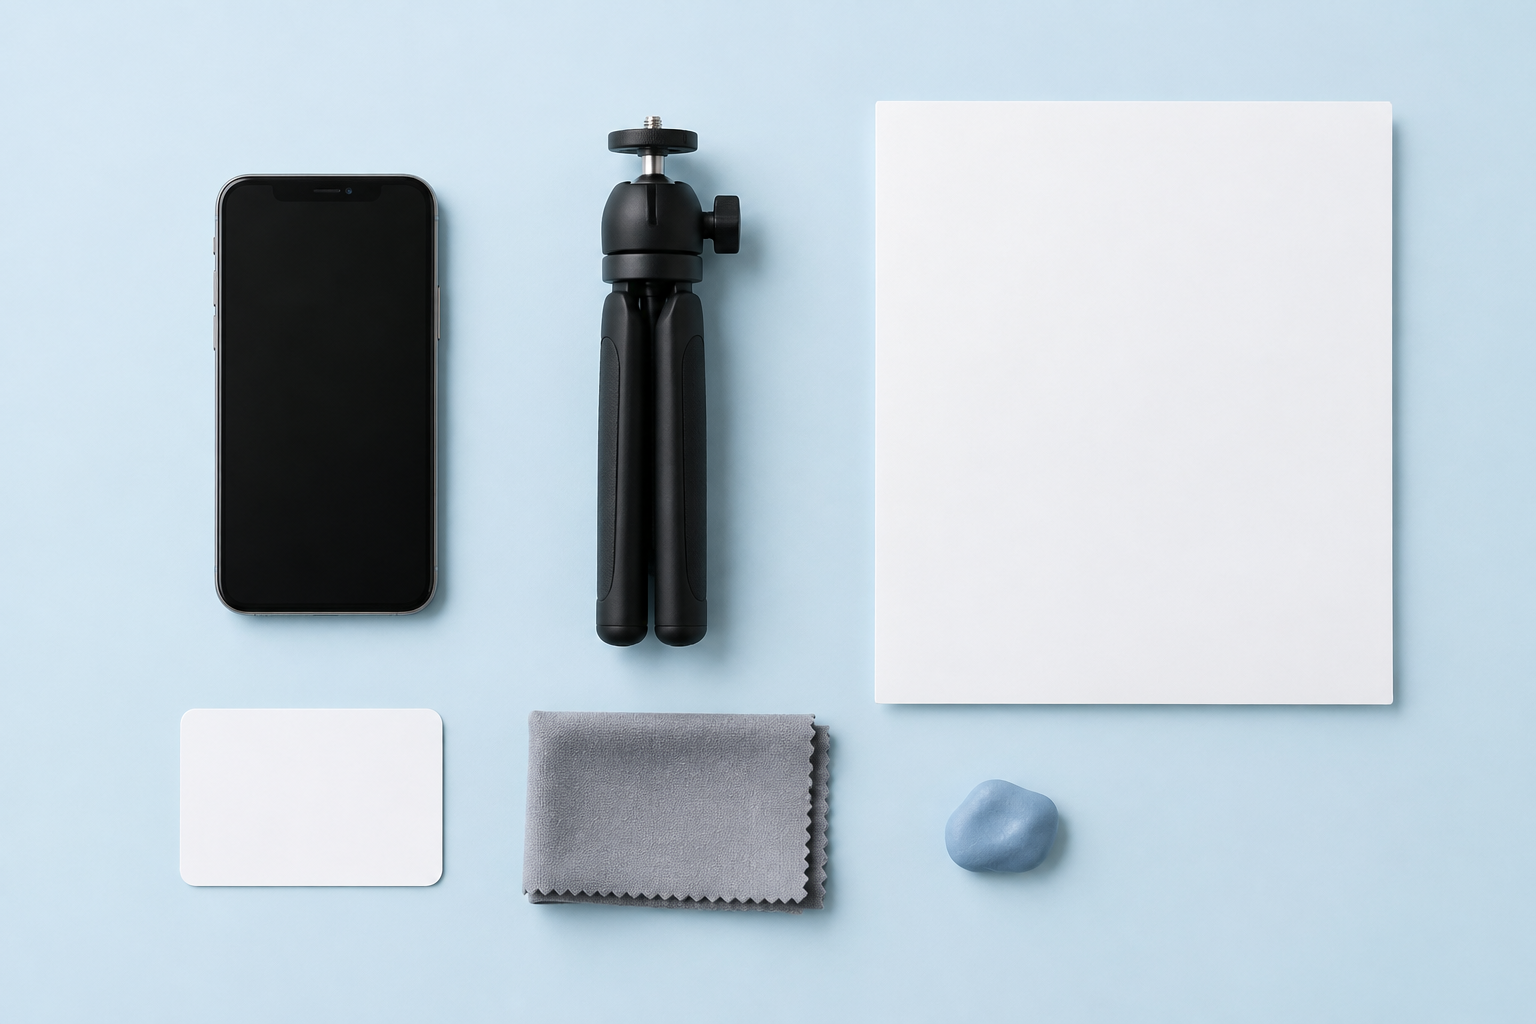
- Your phone. Any smartphone from the last few years is plenty. Wipe the lens with a soft cloth before every shoot. A greasy lens, courtesy of pockets and fingers, is the most overlooked reason for hazy photos.
- A backdrop. White poster board or foam board from a stationery shop usually runs from about R30 to R80, depending on size and where you shop. A plain white bedsheet, a large tile or a sheet of wood-look vinyl also works well.
- Something steady. A basic phone tripod is roughly R100 to R250. No budget yet? Stack a few books and prop your phone against something heavy. A tripod keeps your framing identical from shot to shot, and a self-timer stops you shaking the phone when you tap the button.
- A white reflector. A piece of white card, or cardboard wrapped in kitchen foil, bounces window light back into the shadows. It costs next to nothing.
- Optional extras. A small table beside a window, a lint roller for dust and fluff, a microfibre cloth for fingerprints, and clear tape or museum putty for propping things up.
Do I need a professional camera for product photos?
No. A modern phone gives you more than enough quality for online store images, because most shoppers view them on a phone-sized screen. A dedicated camera might be worth considering later if you start printing large catalogues, shooting for magazines or photographing tiny items that need very fine detail. Until then, spend your money on a backdrop and a tripod first.
Natural light for product photography with phone cameras
Light is the biggest upgrade you can make. Soft, even daylight beats any gadget. Here's the setup:
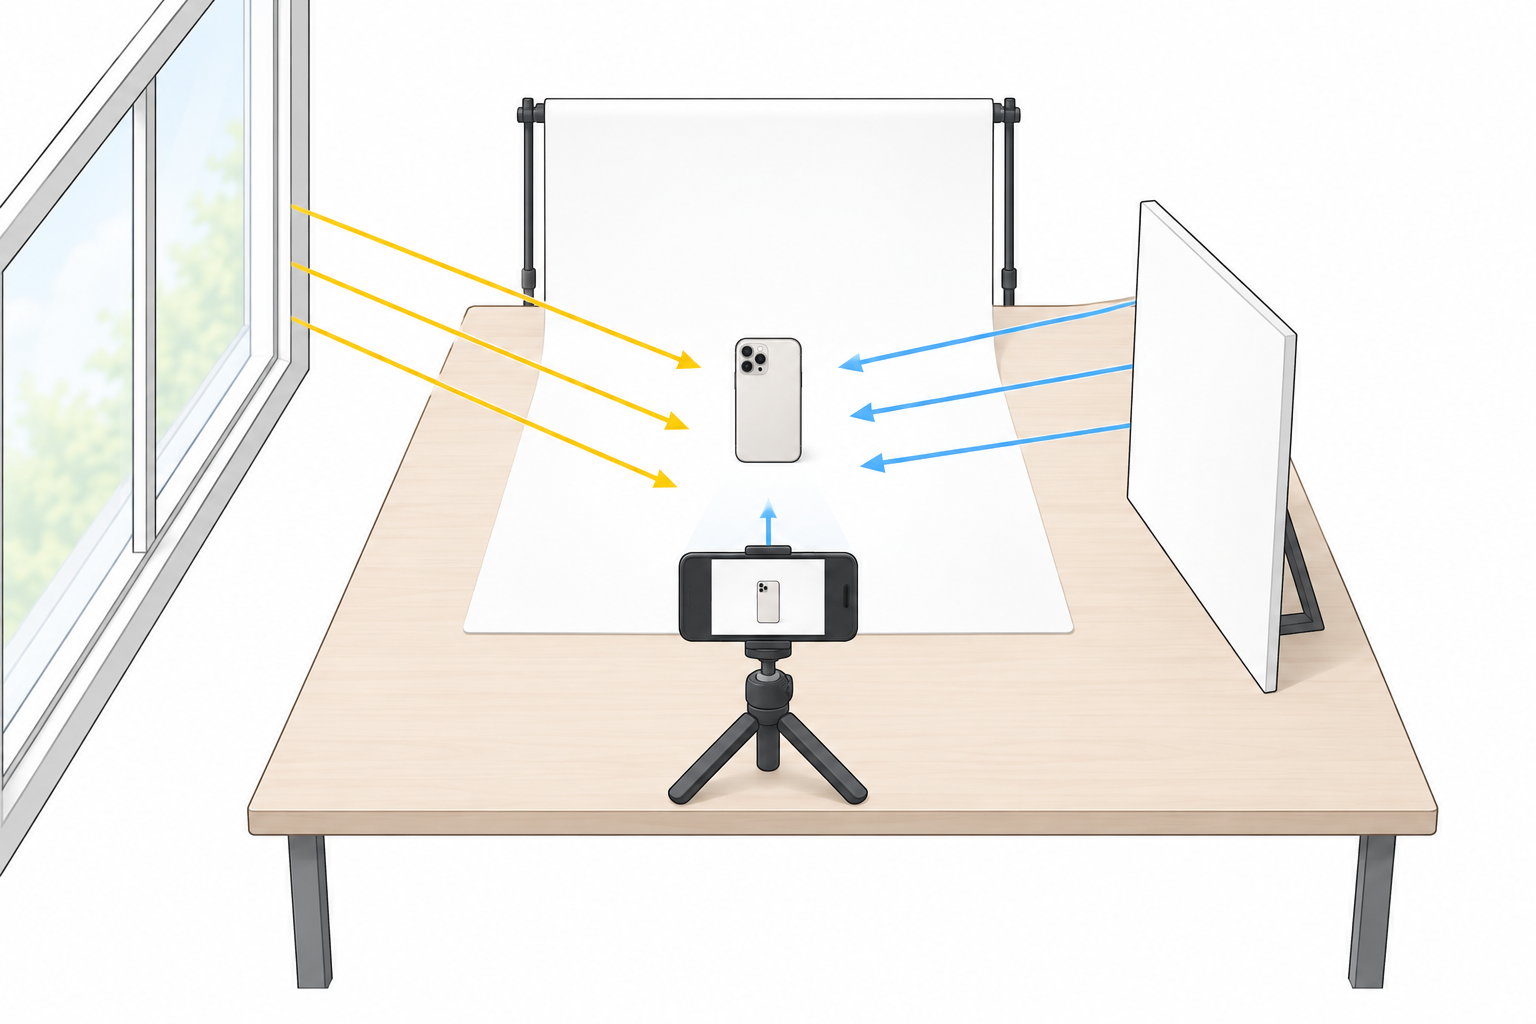
- Park a table beside a large window. Shoot during the brightest part of the day, but avoid harsh direct sun, which creates hard, dark shadows.
- Diffuse strong sunlight. Hang a thin white curtain over the window, or tape a sheet of baking paper across it. It works like a free softbox.
- Turn off the overhead lights and lamps. Mixed light sources make products look yellow or blue, and fixing that later is a headache.
- Bounce light with white card. Place it opposite the window, just outside the frame, to soften shadows on the side of your product.
- Tap to focus, then nudge the exposure. Tap your product on screen, then slide the brightness slightly up so whites stay white instead of turning grey.
- Keep the phone level and steady. Use your tripod or book stack, plus the grid lines in your camera settings.
What about grey days and load shedding in South Africa?
This is a very South African problem, so let's be practical:
- Shoot around midday, when the light is strongest, and sit as close to your brightest window as you can.
- Batch your photography on bright days. Shoot lots of products in one session instead of one at a time.
- If daylight just won't cooperate, use a rechargeable LED lamp with baking paper taped over it as a diffuser. A rechargeable one keeps working through a power cut.
- Don't mix lamp light with window light in the same shot. Pick one and stick to it.
What background works best for online store images?
For most sellers the answer is plain white or light grey. It keeps attention on the product, looks tidy on a mobile shop page and makes the whole catalogue feel consistent. Here's how the common options compare:
| Backdrop | Best for | Pros | Cons |
|---|---|---|---|
| White | Almost everything | Clean, bright, consistent | Can show marks; white products may blend in |
| Light grey | Shiny and white items | Soft, forgiving, hides dust | Slightly less bright |
| Coloured paper | Playful or seasonal looks | Eye-catching | Can cast a colour tint on the product |
| Wood | Homeware, food, candles | Warm, natural feel | Grain can distract; hard to keep consistent |
| Fabric | Soft goods, jewellery | Adds texture | Creases show up; needs ironing |
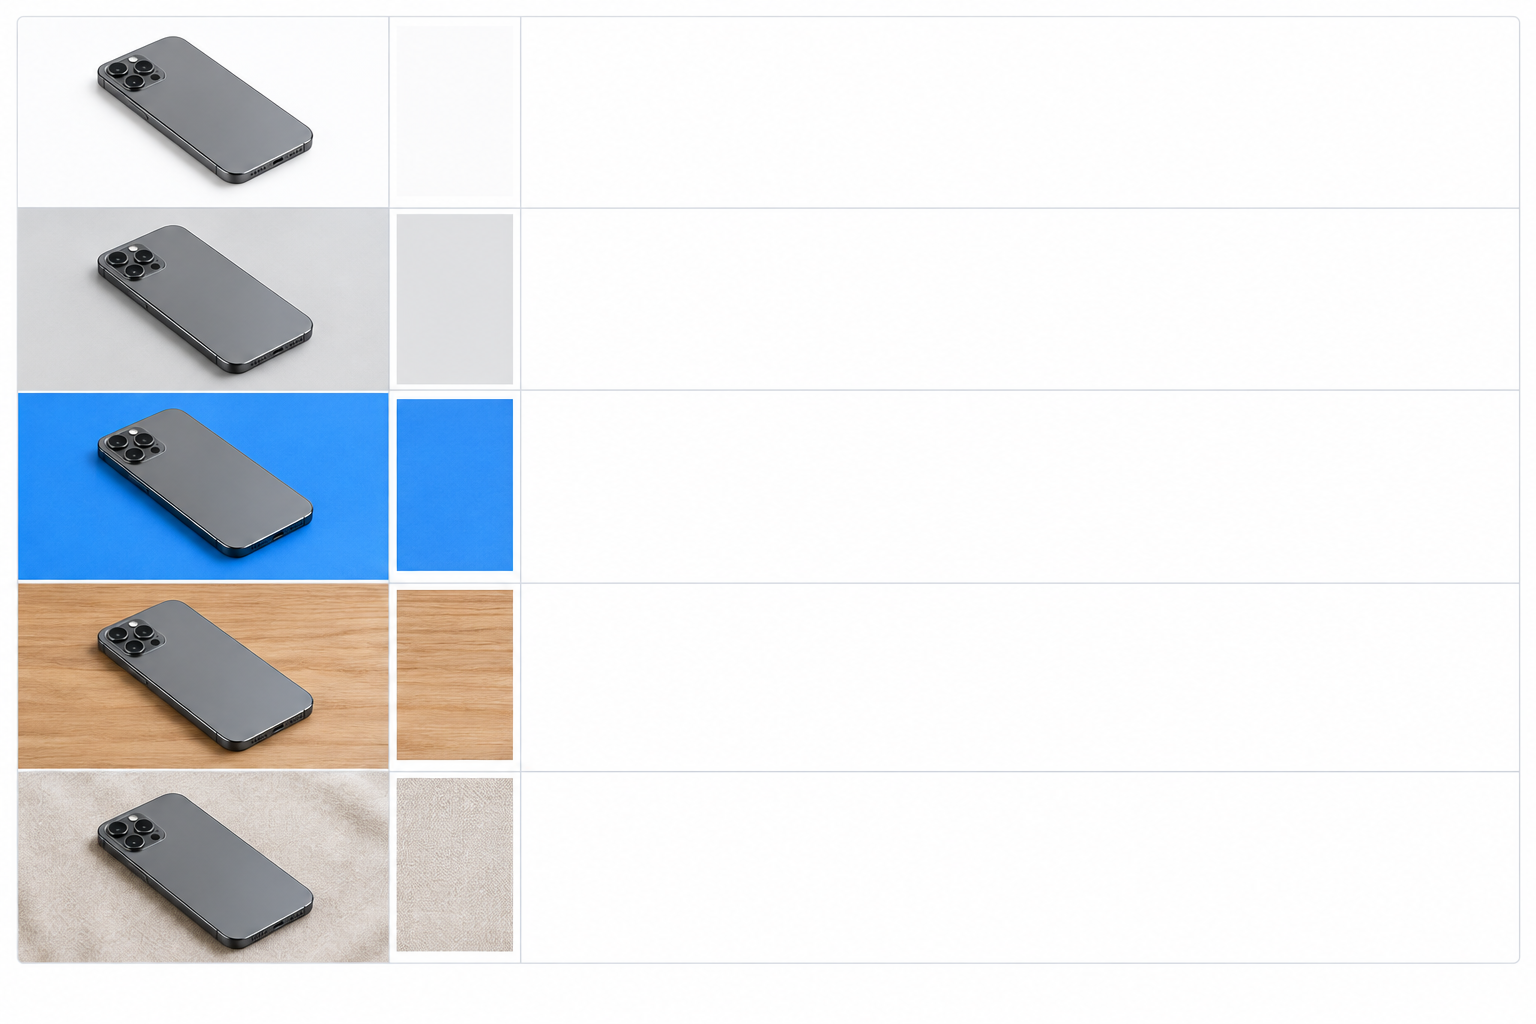
A few rules of thumb:
- Dark items go on light backgrounds. Light items look better on mid-tones or soft texture.
- Use lifestyle backgrounds on purpose. A kitchen counter, a plant shelf or your studio table can help sell homeware, food and beauty products, because buyers can picture the item in their own space. Just keep it uncluttered.
- Use the same backdrop across your whole catalogue. It's the quickest way to make a small shop look professional.
How many product photos should you take per product?
Aim for four to six photos per product, and more for complex items. Baymard's research shows shoppers want answers, not just one pretty picture. Here's a handy shot list:
- The hero shot. Clean and front-on, with the product filling most of the frame on a plain background. This is the image people see first.
- Angle shots. Side, back and top views, plus any feature that matters, like a zip, a pocket or a lid.
- A close-up. Show the texture, stitching, label or material.
- A scale shot. Put the product in a hand or beside a familiar object, like a coin or a mug, so buyers understand the size.
- An in-use or lifestyle shot. Help people picture it in their own lives.
- Variant shots. One photo for each colour or size, and a group shot for bundles.
Phone camera tips for better product photos
- Think about a square or 4:5 crop while you shoot, so nothing important gets cut off later.
- Switch on the grid lines and keep the phone level.
- Skip the digital zoom. Move closer instead, or step back and crop later.
If you sell services, bookings or tickets
Shopstar isn't just for physical goods. You can also sell digital downloads, memberships, service bookings and event tickets, all through one checkout, so your photos should cover those too. Running a yoga studio? Photograph your space, your mats and a class in progress (with permission). Offering treatments through a booking system? Show the treatment room and the finished result. Selling event tickets for a workshop? Show the venue and a snapshot of a past session. Building a membership site? A warm, welcoming cover image sets the tone. Even digital downloads sell better with a clear mock-up or preview image.
How to photograph small, shiny and tricky products
Some products fight back. Here's how to win:
- Small items like jewellery. Use your phone's macro mode, or step back and crop later. Keep the phone on a tripod and use putty or tape to prop pieces up.
- Shiny and reflective items such as jewellery, glassware and metal. Shoot in soft, diffused light and adjust the angle so you don't see your own reflection. White or black card placed around the item controls what shows up in the shine.
- Transparent items like bottles and glass. Try backlighting: put a white sheet behind the item, with the window beyond it.
- Clothing and textiles. Steam or iron first, then use a hanger or a flat lay. Make sure the colour is true.
- Food and beauty products. Shoot near a window, keep surfaces spotless and show the texture, whether that's a creamy balm or a crumbly rusk.
- Dark and white products. For dark items, nudge exposure slightly up so details don't vanish. For white items, nudge it slightly down so they don't blow out into a blank blob.
Quick troubleshooting for product photos
| Problem | Likely cause | Fix |
|---|---|---|
| Glare on shiny items | Direct light or your own reflection | Diffuse the light, change the angle, use white or black card |
| Dull or dark photos | Not enough light or exposure too low | Move closer to the window, use a reflector, slide exposure up |
| Yellow or blue colour cast | Mixed light sources | Turn off lamps, adjust white balance when editing |
| Blurry photos | Shaky hands or dirty lens | Use a tripod and timer, wipe the lens |
| Product looks small or flat | No scale or depth cue | Add a scale shot and an angled view |
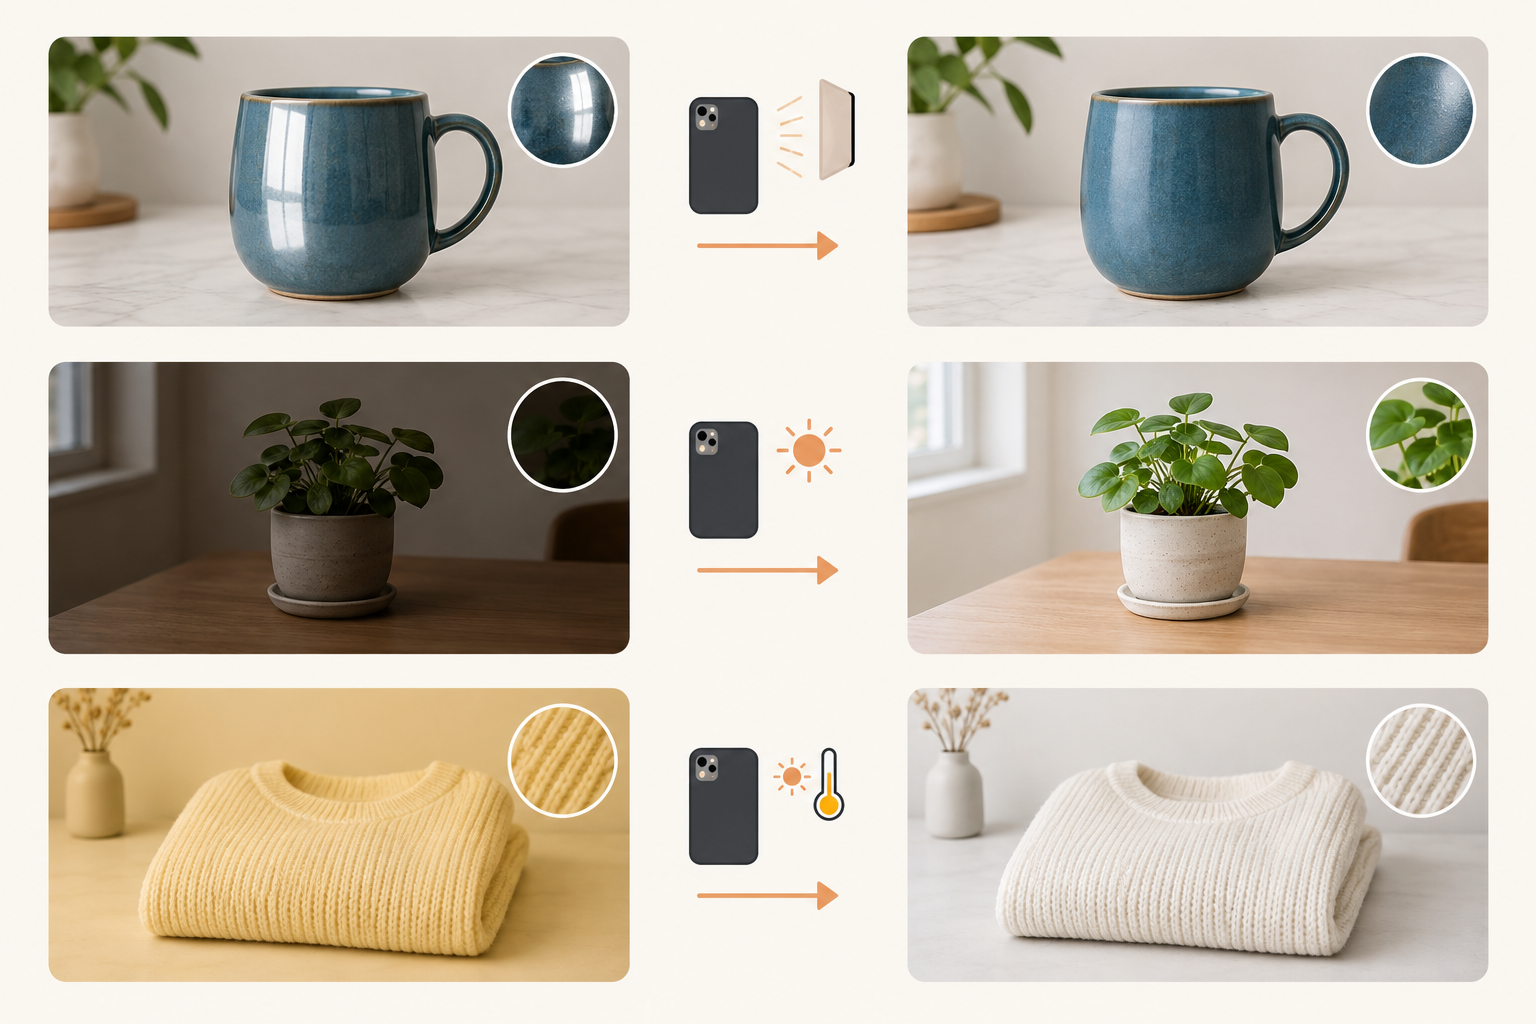
Quick edits that improve online store images
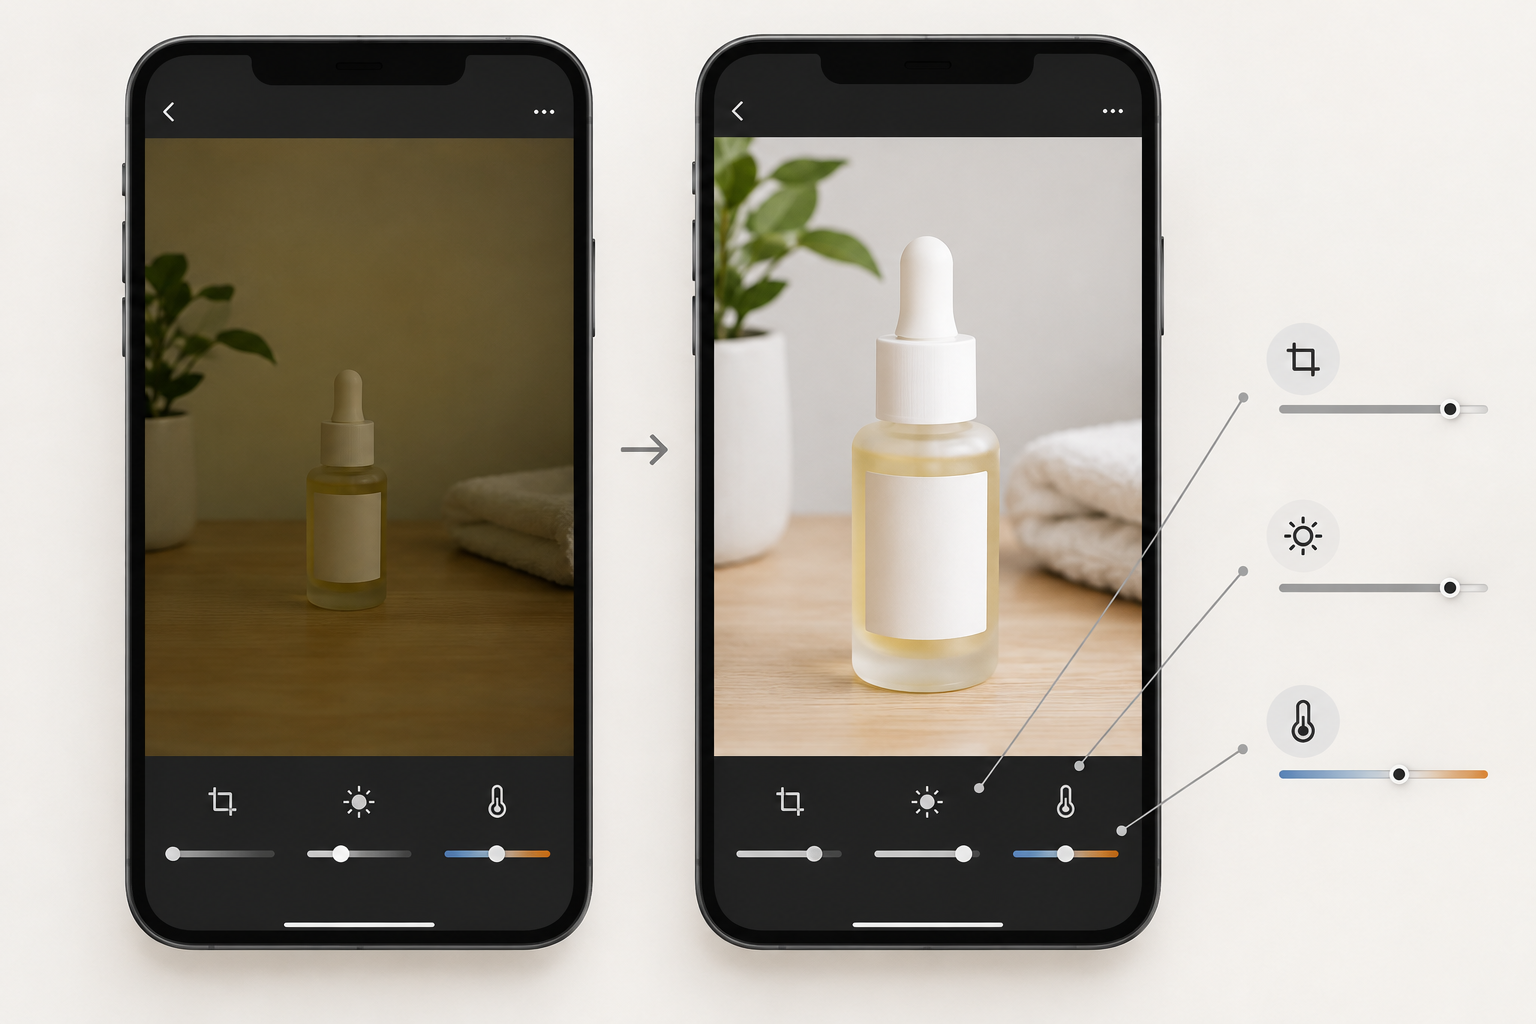
You don't need Photoshop. Free apps like Snapseed, Google Photos, Lightroom Mobile or your phone's built-in editor will do the job. Keep the edits light and honest:
- Crop and straighten. Centre the product and make sure horizon lines and tabletop edges are level.
- Brighten slightly and lift the shadows. This reveals surface detail without making the image look fake.
- Fix the white balance. Whites should look truly white, and colours should match the real product. Hold the item next to your screen to check.
- Add a little contrast and sharpness, and go easy. Over-sharpening and heavy saturation make products look unreal.
- Clean up small blemishes and dust, but never edit out real flaws. Under the CPA, customers are entitled to goods that match how they were presented, so honesty protects them and you.
- Keep every photo the same size, ratio and style. Edit one image, then use it as your reference for the rest.
- Export at a sensible size. Enlarging a small image won't bring back detail, but giant files slow your page down. Google has reported that 53% of mobile visits were abandoned when a page took longer than three seconds to load (a general 2016 mobile-web figure). With many South African shoppers on mobile data, lean files matter.
Uploading product photos to your Shopstar page
You've got a folder of lovely photos. Now let's get them in front of buyers.
- Name your files clearly. Something like handmade-soy-candle-lavender.jpg beats IMG_4821.jpg. It keeps you organised and helps with search.
- Add your product in your Shopstar dashboard and upload your photos with the hero image first, since it's the one shoppers see before anything else.
- Write alt text (a short description of what's visible) wherever the editor offers it. It helps with accessibility and search. Describe the image plainly rather than stuffing in keywords.
- Preview on your phone. Most link-in-bio traffic arrives from phones, so check that images look sharp, aren't cropped oddly and load quickly.
- Use the same approach for everything you sell, whether that's physical products, digital downloads, bookings, memberships or event tickets. Cover images and venue shots follow the same rules: clear, bright and consistent.
Before you upload, check Shopstar's current help documentation for supported file formats and size limits. They can change, so it's best not to guess. And if you get stuck, don't panic. Shopstar is built for non-technical sellers, and the support team offers hands-on help with onboarding.
Test your new product photos with low risk
Not sure your new photos will make a difference? You can test them on a live shop without a big commitment. The Start Free plan has no monthly fee, and you pay 6% all-in per sale (a 2.9% payment gateway fee plus a 3.1% Shopstar fee). The Lower Fees plan has a monthly fee and charges 2.9% per sale. Payment processing is built in through Shopstar Go (card, Apple Pay and Scan to Pay), with automatic daily payouts to your South African bank account. It's a handy set of small business tools if you'd rather spend your time making things than wrestling with tech.
A quick note on POPIA and product photos
If your photos include identifiable people, such as models, customers or your staff, get their consent first. That's part of complying with the Protection of Personal Information Act (POPIA). Also check your backgrounds for personal details like addresses, ID documents, order slips or other customers' names before you hit upload.
A simple 30-minute product photography routine
Here's a routine you can repeat every time you add new stock:
- Prep (5 minutes). Clean your products, wipe your lens and set up your backdrop beside the window.
- Shoot (15 minutes). Do all the hero shots first, then angles, then details, then lifestyle. Photograph several products in one session so the lighting stays consistent.
- Edit (5 minutes). Apply the same adjustments to the whole batch.
- Upload and review (5 minutes). Add them to your Shopstar page, check them on your phone and swap out any weak photos.
Don't try to fix your entire catalogue in one go. Start with your five best-selling products, get those looking sharp, then work through the rest. Every improvement counts. 🌟
Frequently asked questions about product photography with a phone
Do I need a professional camera to take good product photos?
No. A modern smartphone paired with soft window light, a clean backdrop and a steady surface produces photos that are more than good enough for an online store. Light and consistency matter far more than the camera itself.
What background works best for online store images?
A plain white or light grey backdrop is the safest and most flexible choice. It keeps attention on the product, looks tidy on mobile screens and makes it easy to keep your whole shop looking consistent.
How many photos should I take per product?
Aim for four to six: a clean hero shot, a couple of angles, a close-up detail, a scale shot and, where relevant, an in-use image. Products with colour or size options need a photo for each variant.
How do I photograph small or shiny items like jewellery?
Use soft, diffused window light, keep your phone steady on a tripod and angle the item so you avoid reflections. White or black card placed around the item can control what shows up on shiny surfaces. Step back and crop rather than using digital zoom.
What can I do about poor light on grey days or during load shedding?
Shoot at midday near your brightest window, or batch your photography on bright days. A rechargeable LED lamp with a diffuser such as baking paper can fill in when daylight is poor. Avoid mixing light sources.
Is it okay to edit my product photos?
Yes, for brightness, cropping and colour correction so the image matches the real product. Avoid filters or edits that change the product's true colour or hide flaws, since customers are entitled under the CPA to goods that match how they were presented.